
Worm castings can do wonders for your garden, but you have to feed the wigglers and keep them happy before you can reap the rewards.
Of course, managing your first worm farm can be tricky, and you won’t always know what food is okay and what isn’t. Plus, maintaining the perfect ecosystem is a challenge on its own.
Don’t let that discourage you; thousands of worm farmers have done it before you.
Thanks to their trial and error, we have a better understanding of the best worm food and care practices.
In this post, we’ll go over a detailed feeding guide that covers everything from the safe items to the proper way of spreading the scraps in the bin. Then, we’ll go over the top five care tips to keep in mind.
Worm Feeding Guide
Considering that the castings are nothing more than worm poop, we have to start our guide with nothing other than the golden key: worm food.
What’s on the Menu?
Worms aren’t the picky type; they’ll gulp up most of the scraps you throw at them.
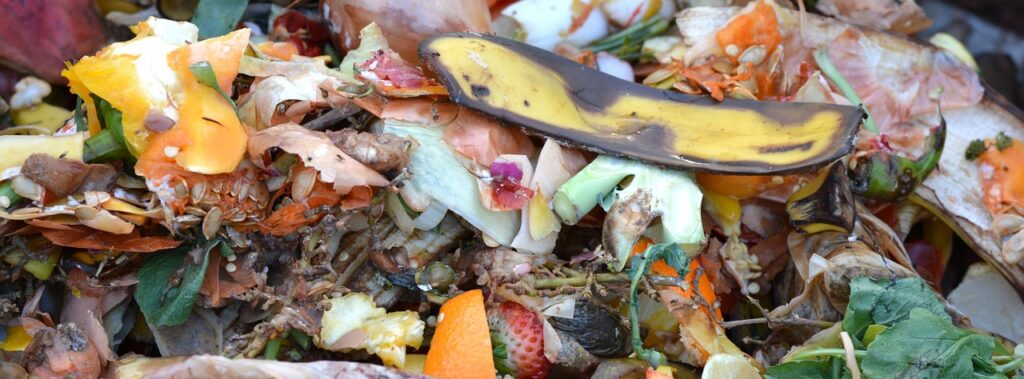
So, take a look at your leftovers and kitchen waste and pick up stuff like:
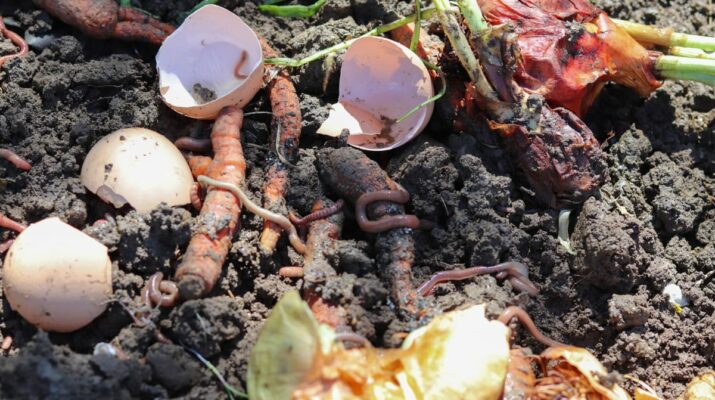
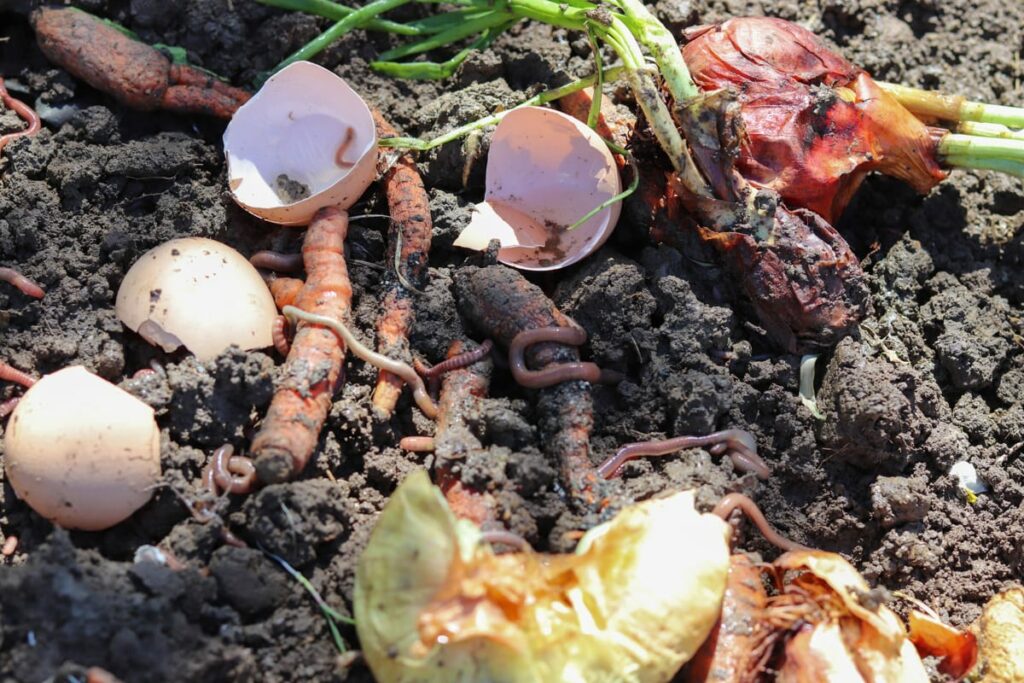
- Vegetables
- Fruit
- Eggshells
- Coffee grounds and filters
- Tea bags
- Napkins
- Newspaper
- Egg cartons
While you’re at it, make sure to avoid the following items:
- Dairy (can stink up the farm)
- Fish and meat (stinky and attracts vermin)
- Woody twigs or branches
- Fresh manure (especially from animals on vermicides!)
- Glossy paper
- Rubber (or any non-biodegradable material)
- Oils
So far, the diet seems simple, right? Unfortunately, things get a little tricky around acidic scraps.
Some orange peels and tomatoes are fine. Yet, excessive amounts will tip the pH balance and make the bin uninhabitable.
How Much Is Too Much?
Your worms need some time to settle in before their appetite opens up. That’s why we’d recommend feeding sparingly during the first week or two.
After that period, go for a once-per-week feeding schedule.
A pro move here is to keep a bucket with a tight-fitting lid in your kitchen to collect the scraps between feedings. This way, when it’s mealtime, you’ll have plenty of food ready.
Now, you might be asking: how much scraps make up a single feeding?
Well, some experts say that red wigglers can handle half their own weight of scraps. So, that would be half a pound of food daily for every pound of worms.
Other sources double the estimate and say that the wigglers will eat as much as they weigh daily.
All in all, not all bins are the same, and you’d be better off eye-balling (and sniffing!) the feeding frequency. If the bin stinks or you can see undecomposed bits, hold off on the next meal.
It’s a simple trick but a vital one. Otherwise, the uneaten food will rot inside the bin, bringing along a lot of trouble for the pH balance and pest situation.
Is There a Wrong Technique?
Picking the right worm food is only half the battle. The prep phase and application technique can make all the difference in keeping your worms happy.
The Prep Phase
This might be news to you, but worms have no teeth—none whatsoever.
That’s why they have to wait until each scrap breaks down a bit before they can gulp it. You can wait for that to happen OR help them out by chopping the meal first.
Since the meal is mostly leftovers, we don’t think there will be any huge chunks, anyway. However, throwing the whole thing into a food processor for a couple of minutes won’t hurt.
It’s also possible to go at it manually with a knife if you have some time on your hands. Just make sure that the pieces are around 1–2 inches.
The Right Site
While warm bins are usually small, you can’t just put the food anywhere and hope for the best. Instead, you’ll want to spread the meal over the bedding layer and under the worm blanket.
In case you still haven’t caught up with the terminology, the worm blanket is the damp sack or newspaper that you lay on top for shade and moisture.
But there’s one catch here.
Spreading the scraps evenly across the bedding can be risky. If, for some reason, the worms don’t like the meal, they’ll have nowhere else to go.
So, try to cover only half of the available surface. Better yet, alternate sides every feeding to be able to monitor the consumption rate.
Troubleshooting Food-Related Issues: What Went Wrong?
No matter how careful you are with the feeding steps, you’re bound to come across a problem or two along the way—it’s just the cost of running a worm farm.
Don’t let that discourage you, though. The most common issues have straightforward answers.
Here, take a look:
- Slow feeding rates? Chop and mince the scraps into smaller bits.
- Stinky farm? Reduce the feeding frequency.
- Persistent stink? Check the drainage holes for blockages.
- Vinegar-like odor? The ecosystem is too acidic. Sprinkle some garden lime, wood ash, or dolomite.
- Fruit flies? Reduce the feeding frequency and keep the lid covered.
General Worm Care Tips
Knowing how to feed the worms is a great first step, but there’s more to tackle.
The moisture levels, temperature, leachate draining, and pest control are all vital aspects of a worm farm care routine.
Let’s see what the fuss is all about with some simple care tips:
1. Keep the Bedding Moist (But Not Dripping)
It doesn’t matter if you’re using shredded newspaper, straw, or other bedding materials—you need to moisten it regularly.
Ideally, you want the bedding to carry enough moisture to produce some water if you squeeze it. However, it should never be soggy.
For the setup, you can soak the bedding in water and squeeze the excess out. For maintenance, a spray bottle will do the trick.
There’s one hiccup: tap water won’t cut it.
In most areas, tap water has a percentage of chlorine, which could affect the beneficial microbe population in the bin.
You don’t have to buy bottled water, though. Just leave some tap water in a bucket outdoors for a full day to let the chlorine evaporate.
2. Monitor the Temperature and Light Exposure
Although some species are forgiving when it comes to temperatures, it’s always better to farm around 55–77°F.
Depending on where you are, you might need to take some precautionary measures during the summer. For instance, spraying the worm blanket more often can help cool down the bin.
In the winter, insulation layers and blankets could do the trick. Still, it’s safer to bring the worm farm indoors.
As for light exposure, your safest bet is a shady spot as the primary location. However, it would be useful to have a backup south-facing spot for the winter.
3. Check the Leachate Tap
Some wormery models come with a built-in tap for the leachate or the “worm juice.”
The intuitive thing here would be to leave the tap closed and open it only when it’s time to collect the fluid, which could be done once every week.
That works fine for many farmers, but it’s risky business if you live somewhere that gets lots of heavy rain.
If the bin lid is leaky, the rainwater will seep down into the leachate collection container. As the water level increases, it could flood the bin and drown your worms.
In this case, it would be wise to leave the tap open all the time and put a bucket underneath it to avoid making a mess.
4. Don’t Delay the Harvest
We get that harvesting the bin sounds more like an end goal than a care tip but bear with us for a minute.
Castings are the worm’s excreta. If you let them accumulate too much, you’re basically forcing the little wigglers to live in their own poop.
Granted, they are worms and don’t care much for personal hygiene.
However, the castings are toxic to worms if ingested. So, if you see a bin full of compost, empty it right away.
5. Know Your Friends and Foes
After a while, you might notice that the bin has more than just worms. Maybe you’ll spot a mite here or a millipede there, and that’s okay.
Not every guest is bad news. In fact, many critters can add balance to the ecosystem.
That said, there are a few unwelcome intruders.
Ants
Ants show up to the party if you’re overfeeding or running a dry ecosystem. The risk here is that they could compete with the worms over resources.
To tackle the issues, set up water and soap “moats” around the wormery’s legs. Remember to keep those containers topped up in the summer.
Centipedes
The real trouble begins if you spot centipedes, which can actually prey on worms!
Plus, the fix here is a little icky: you’ll have to pick them up or pinch them while watching out for their bites.
Alternatively, you can try sprinkling diatomaceous earth on the surface layer, but it has to be food-grade. Keep in mind that once it gets wet, it’s no longer effective.
Enchytraeids (Pot Worms)
You might see tiny white worms squirming alongside your typical red composting worms. Odds are, those are Enchytraeids or pot worms.
On their own, they’re pretty harmless. However, an infestation of those white critters can indicate one of two things:
- Your worm farm is too wet.
- You have a pH problem on your farm. (Spoiler alert: it’s too acidic)
So, either dial back on the bedding sprays or refer to the neutralizing fixes that we mentioned earlier for the vinegar-like odor.
Black Soldier Fly Larvae (BSFL)
Finally, you could spot some black soldier fly larvae. While those aren’t a huge risk, an infestation might be a warning sign that you have an issue with your carbon-nitrogen balance.
Usually, BSFLs mean that your bin has more greens (nitrogen) than browns (carbon). Naturally, the fix is adding more browns.
If you’re not sure how to tell greens and browns apart, check this hack: anything that stinks if left damp for a while is a green.
Final Thoughts
That’s a wrap on our worm food and care guide.
The key takeaways here are:
- Use a mix of green and brown table scraps.
- Never overfeed.
- Moisten the carbon-rich bedding regularly.
- Neutralize low pH levels with alkaline materials, like dolomite.
- Keep an eye on potentially dangerous critters.
Remember that if your worms aren’t happy with the farming conditions, they’ll crawl out of the bin!