
Whether you’re interested in sustainable efforts or willing to profit from a side hustle, commercial worm farming might be your window.
Starting a commercial worm farm, as with any other business, requires a solid plan. You’ll want to consider several facets, such as your marketing scope, financial outlook, and resource supply.
The best part about starting a worm farm is the low initial cost. When it comes to profitability, worm farming has potential. Nevertheless, several risks may arise as you continue to grow your wormery.
For this reason, your expertise is essential for resolving viable issues, from a dying population to unpredictable weather. Stick around to learn how you can build your commercial worm farm.
How to Create a Commercial Worm Farm
Creating a commercial worm farm might stem from a passion for sustainability, or you could just love worms. Either way, here’s how to commercialize your worm farm.
Step #1: Research Worm Farming
Before you embark on your vermiculture journey, you need to do your necessary research. Whether starting as an expert or a beginner, expand your knowledge about worm care, concerns, and environments.
Find information from online resources, books, journal articles, and demonstrative videos. Besides that, you’ll want to create a business plan for commercial success. Start with an executive summary detailing why you’re building a worm farm.
Write your company’s description, which should discuss what issues your business solves. List the stakeholders involved in the industry. You’ll also need to create a market analysis to scope the industry, including your competitors.
In terms of your research, it should focus on how you’ll build a habitable and long-lasting farm for your wrigglers. Find out where you’ll source your items, equipment, feed, and worms. Your plan should also outline your funding requirements and financial projections.
Step #2: Create Your Brand
When creating your brand, ask, “Who are you marketing your product to?” Finding your niche will ease you into the brand you want to build. For example, let’s assume you’re creating a worm farm to sell the crawlers as bait to angler shops.

In this scenario, your branding needs to target the bait market. Subsequently, you can name your company “Hungry for Worms?” After choosing a name, ensure it’s not already in use with the secretary of state. Afterward, create a slogan and define your purpose.
You’ll also want to create a unique selling point to differentiate you from competitors. For this reason, a competitor’s analysis will prove most useful.
Step #3: Register Your Business
Now comes the paperwork. As you make it official, contact the state’s Department of Agriculture for any required permits. Since worms are a critical element in urban agriculture, their sale is regulated.
The regulation will help prevent issues with local ecosystems and emitting pathogens and other diseases. We highly recommend looking into local laws about permits and a business license for selling worms and other composting mediums.
The action is critical because some states prohibit selling live bait across state borders. Another aspect worth considering is the sales tax permit since some states need customers to pay a tax when purchasing worms.
Step #4: Secure a Location
After getting all the paperwork out of the way, it’s time to secure a location. Fortunately, worm farming is versatile when picking a place. You can host your worm farm in your basement, shed, or backyard.
Your worms will thrive so long the farm is ventilated, warm, dark, dry, and exposed to 40 to 80 degrees F. The bedding shouldn’t be bone dry.
A bit of dampness is essential for the wriggler’s survival. At the same time, it shouldn’t be too moist, or they may drown. In turn, you’ll want to keep them indoors during rain.
Similarly, direct sun will dry out their skin. Since they breathe from their skin, drying it will likely kill them.
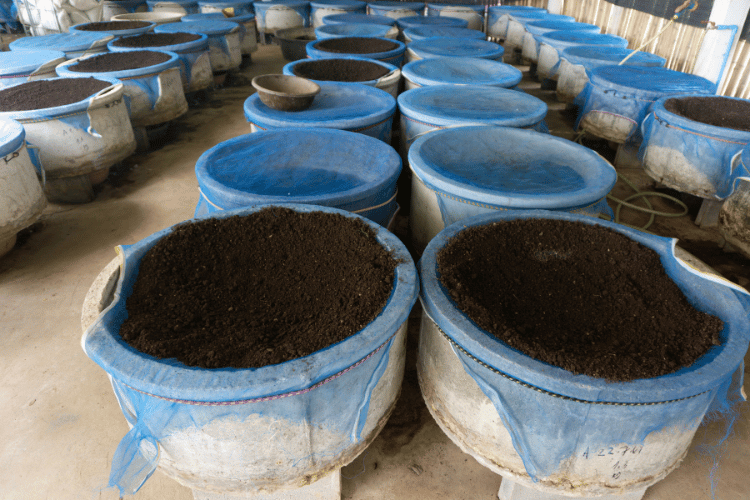
Step #5: Create the Ideal Environment
Now, you’ll want to create a home for your worms. Your wormery housing size depends on the number of worms you’ll accommodate. Either way, we suggest starting small before expanding your farm.
You can purchase an eight-inch deep container. Alternatively, you can aim higher with a 24-inch deep wormery. In terms of material, you’ll either use plastic or wood.
Dense wood is optimal for offering the best insulation and excess moisture absorption. Avoid using treated options because they may contain toxic components that can adversely affect your wrigglers.
That said, your worm bin may already be in your house. It can be an old wooden kitchen cabinet, dresser, or drawer. Using these already-available items will reduce your business’ start-up costs.
Meanwhile, plastic bins tend to keep your compost on the wet side. Nevertheless, they’re more convenient to sanitize.
Once you’ve gotten the worm bins, drill holes at the bottom to keep the moisture out. Otherwise, the lack of drainage can drown your worms.
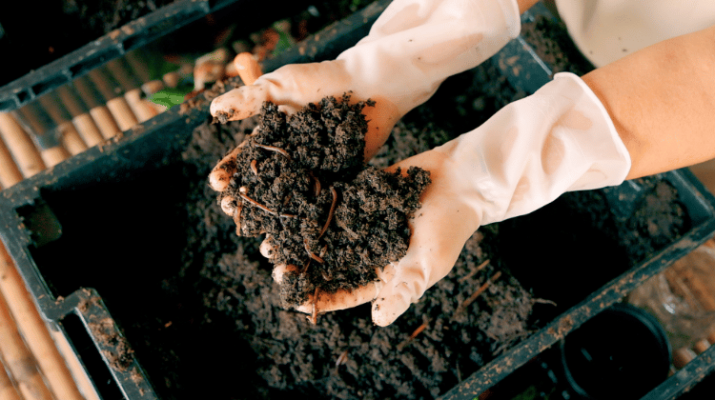
Step #6: Fill the Wormery Bins
Once your bins are prepped and holed, fill them with bedding. The organic content will offer the worms’ habitat and feeding ground. You’re trying to mimic the worms’ natural environment.
In turn, you can use
- Shredded newspaper
- Garden clippings
- Shredded Cardboard
- Organic compost
- Garden soil
- Leaves
- Wood chips
- Peat moss
- Coconut coir
You can use a mixture of all the items above. The most critical material is soil. Worms use it to process their meals.
You’ll want to wet the bedding and wring any excess moisture off. Ensure the material is non-toxic to avoid illnesses. Afterward, the bins should fill with ¾ capacity.
Place the content in layers. The bottom layer can be filled with shredded cardboard and newspaper. Next, shovel a layer of soil, leaves, and garden compost.
Fluff the content to introduce more oxygen into their environment. Plus, it’ll reduce the stuffy smell. If your worms are trying to escape or dying, you’ll likely need to reexamine the bedding conditions.
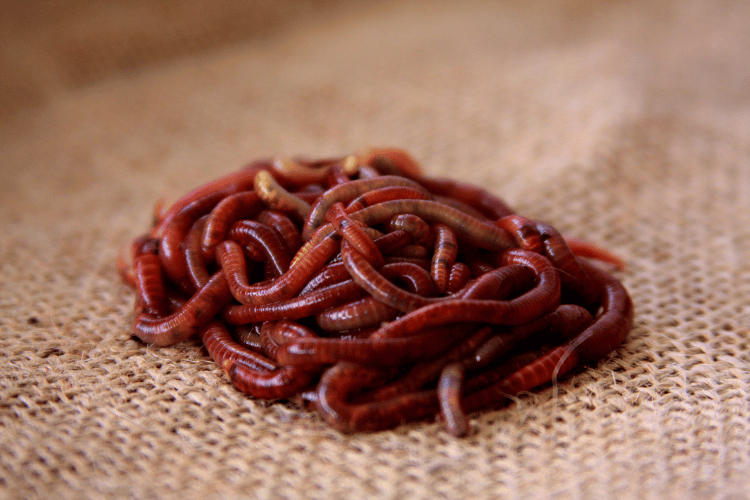
Step #7: Decide on the Type of Worms
Now that the bins are filled, your guests can start squirming in. You can decide between a few types of worms.
Your choice primarily depends on your potential customers. The most common are night crawlers and red wigglers. Alternatively, you can find a supplier that breeds a hybrid to get the benefits of both worm kinds.
Red Wigglers
Red wigglers are preferred if you’re selling compost or worm castings. In turn, you’ll want these worms if your customers consist of gardeners and other stakeholders in the sustainable agriculture industry.
In addition, these worms grow about five inches long. Red wigglers can eat the equivalent of their body weight in compost daily.
When exposed to an ideally humid environment, they can breed quickly. Subsequently, they’re the most cost-effective option for fertilizer production.
Night Crawlers
Night crawlers are relatively more resilient than red wigglers. They’re more versatile with their environment, making them perfect for beginner worm farmers.
Despite that, they’re slower in terms of reproduction. Nonetheless, night crawlers are best if your target customers are angler shops and fish farms.
They make for exceptional bait due to their larger size. Plus, their faster movements make them better at aerating the garden soil.
Step #8: Welcome the Worms and Feed Them
Whether you’ve chosen red wigglers, night crawlers, or a hybrid, spread them evenly across the bin’s surface. The ratio of worms to bedding should be approximately two to one.
Next, spread an additional layer of shredded damp newspaper above the worms. Once they’re settled, start feeding them. You don’t want to add random bits of food waste to the bins.
Food to Avoid
Avoid dairy, meat, oily foods, and grains. Although microbes and bacteria are beneficial to the process, these foods tend to produce a strong odor.
Consequently, flies will be coming your way. Plus, they are usually more challenging to digest, adding more time to the process. You’ll also want to avoid citrus rinds because they attract fruit flies and cause a pH imbalance.
Food to Add
Your worms can benefit from a healthy diet of coffee grounds, eggshells, newspaper shreds, vegetables, and fruits.
Coffee grounds are one of the best feeding options since they’re cheap. Additionally, their gritty texture helps the worms grind foods in their digestive tract. Eggshells offer calcium and reduce any acidic elements within the bin. They also provide similar digestive aid to coffee grounds.
Step #9: Create Your Selling Plan
Now that your commercial worm farm is running, it’s time to market your little wigglers or their compost to potential buyers.
You can start by creating social media platforms to build your brand. Additionally, construct an e-commerce website to ship your products.
Gathering customers can come from word-of-mouth, or you can contact them directly and offer your service. For example, you can give your business card to angler shops and gardeners.
Aside from that, you’ll want to promote your business as a sustainable effort. That way, it’ll raise awareness of the benefits of vermiculture and adopting a waste-free household.
Pricing Your Products
You can sell a pound, approximately 1,000, of earthworms for about $20 to $40. Meanwhile, nightcrawlers can sell for around $30 to $40 per pound, which is around 350 to 400 worms.
As for your worm castings, $3 per pound is the average for small businesses. In addition, you can offer your worm tea for around $5 to $10 per gallon.
How Do Commercial Worm Farms Profit?
A commercial worm farm can profit from several routes. As a vermicomposter, you can sell the worms you breed to others willing to start a worm farm. Several businesses and individuals can benefit from the wriggler’s compost-eating, such as
- Gardeners
- Nurseries
- B&Bs
- Hotels
- Inns
Besides that, your worms can benefit other establishments in other methods. For instance, fish farms and angler shops can use the worms as feed and bait. Animal feed producers can also use the worms to feed on their manufacturing waste.
Another prospective buyer could be someone who wants the worms to consume their kitchen waste. In this case, you’ll be selling starter kits of the worms.
Your worms can produce commercial worm tea. The concoction involves soaking the compost excreted by the worms in water after removing the wrigglers. The result is a beneficial liquid used to alleviate diseases and symptoms of polluted soil.
Pros of Building a Commercial Worm Farm
Here are the top reasons you should consider building a commercial worm farm.
High Price of Synthetic Fertilizer
With fertilizer prices surging to 30% since 2022, gardeners and other stakeholders are likely searching for cheaper alternatives. Your worm castings will likely offer a more sustainable and cost-effective option.
Sustainable Growth
Public awareness regarding food waste and sustainable efforts is increasing. Media documentaries such as “Biggest Littlest Farm” and “Food Inc.” have given audiences exposure to regenerative agriculture.
Cons of Building a Commercial Worm Farm
Before starting the business, consider the factors below.
Profit Doesn’t Come Easy
After putting in all your sweat and tears into growing your commercial worm farm, get ready to put in more for marketing it. Attracting customers and vendors to purchase your worm castings is a separate battle.
On top of marketing, you need to wear other hats, i.e., worm feeder, casting extractor, and cleaner. Completing all these tasks while attempting to get your target audience’s attention is far from easy.
High Competition
Large worm casting producers have more efficient and consistent production. You’ll likely have to advertise yourself as an “artisanal” or “homegrown” brand to distinguish your product. Your other unique selling point has to be your vermiculture’s quality.
We recommend preparing a biological report to entice buyers with your product’s quality. Plus, your product is likely fresher than mass-produced options, so be sure to emphasize that in your marketing message.
Final Thoughts
Building a commercial worm farm is a step in the right direction for sustainable food waste practice. Nevertheless, in terms of profit, your worm farm business will likely take time to get turnover.
From tackling high competition to marketing challenges, you’ll need to put in lots of effort to witness a decent profit margin. Difficulties aside, your mission and passion for worm farming can drive you forward as a loyal and influential seller in the market.