
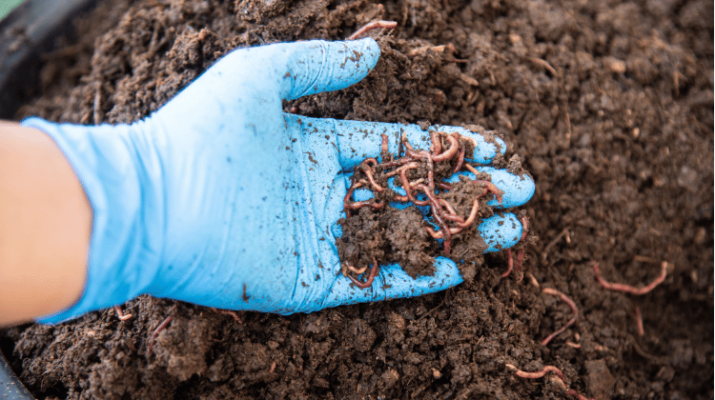
Traditional worm bins are perfect for managing kitchen scraps and generating compost for a personal garden. But it’s a whole different story when it comes to large-scale businesses.
Imagine a bustling restaurant or a food processing facility that churns out massive amounts of organic waste daily. Now, think about the mess of sifting through mounds of decaying matter to separate worms from the compost.
Enter the commercial flow-through worm bin design specifically tailored to meet the demands of these establishments. Here, we’ll break down the benefits, construction, and more of this vermicomposting concept. So, let’s roll up our sleeves and get started!
What Is a Commercial Flow Through Worm Bin?
A commercial flow-through worm bin, also known as a continuous flow-through (CFT) vermicomposter, lets you add organic waste and harvest worm castings without disturbing the worms.
This elegant system benefits from a worm’s natural behavior to stay within 6–8 inches of the topsoil, close to fresher food sources. As you feed the worms from the top, they work their way upward, leaving behind their castings in the lower section of the bin.
The structure of a commercial flow-through worm bin typically consists of a large compartment raised above the ground. This design encourages proper aeration and drainage while providing a suitable environment for worms to thrive.
Some models offer modular designs where you can attach additional modules as needed. That way, you can customize the system’s size to your operation’s requirements.
A Brief History of Commercial Flow Through Worm Bin Design
The history of commercial flow through worm bins can be traced back to the past four decades. Let’s take a look at the significant milestones in the development of CFT vermicomposting:
- 1981: Dr. Clive Edwards and a team of agricultural engineers pioneered worm farming, paving the way for modern-day CFT reactors.
- 1986: Victor Phillips patented a vermicomposter design that inspired today’s CFT vermicomposter design.
- 1990: Dr. Edwards continued his research on vermiculture and CFT reactors.
- 1991: Dan Holcombe and Dr. Edwards built an industrial CFT reactor based on Phillips’ concept. Holcombe then founded Oregon Soil Company, which processed grocery waste.
- 1996: Albert Eggen patented a fully enclosed CFT system with automatic temperature-controlled ventilation.
- 1998: Dr. Scott Subler demonstrated the benefits of pre-composting feedstock. The process removed thermal energy before feeding it to the worms.
- 2012: Jack Chambers streamlined the harvesting process with a cutting bar track incorporated into the CFT design.
- 2019: Dan Lonowski commercialized a rail-guided cutting bar system for the mass production of vermicompost.
Components of a Commercial Flow Through Worm Bin Design
These are the critical components of a commercial-grade CFT worm bin:
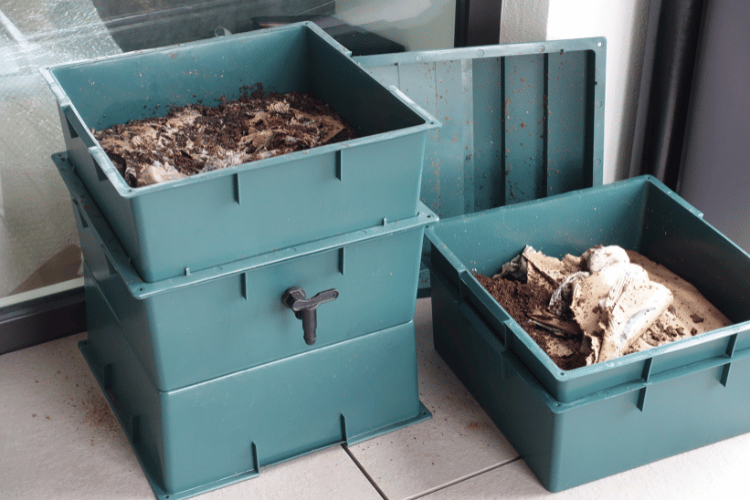
- Bin Structure
The main structure of the worm bin provides the framework for the system and holds everything together. It should be sturdy, durable, and moisture-resistant.
Common materials used in the manufacture of commercial CFT worm bins include:
- Fiberglass reinforced plastic
- High-density polyethylene (HDPE)
- Polyvinyl chloride (PVC)
- Steel Grating
The bottom floor of the bin comes with stainless or galvanized steel grates that allow excess moisture to drain out. It also facilitates the extraction of worm castings.
- Cutting Bar
The cutting bar is crucial to harvesting vermicompost in a commercial CFT worm bin. It’s positioned a few inches above the bottom grating and separates the finished vermicompost from the active worm zone.
When activated, the cutting bar slides back and forth, cutting through vermicompost and pushing it through the openings beneath it.
- Harvest Drive
Industrial CFT systems employ an automated drive train to engage the cutting bar. A typical harvest drive is a motorized system connected to a power transmission mechanism, such as gears or belts.
The motor generates rotational motion transmitted to the cutting bar, causing it to move from end to end.
For small or midscale CFT worm bins, you can use a manual winch to activate the cutting bar instead.
- Collection Mechanism
The catch mechanism underneath the bin collects the separated worm castings during harvest. It can be anything from a tarp to a rolling tray or conveyor belt.
How a Commercial Flow Through Worm Bin Design Works
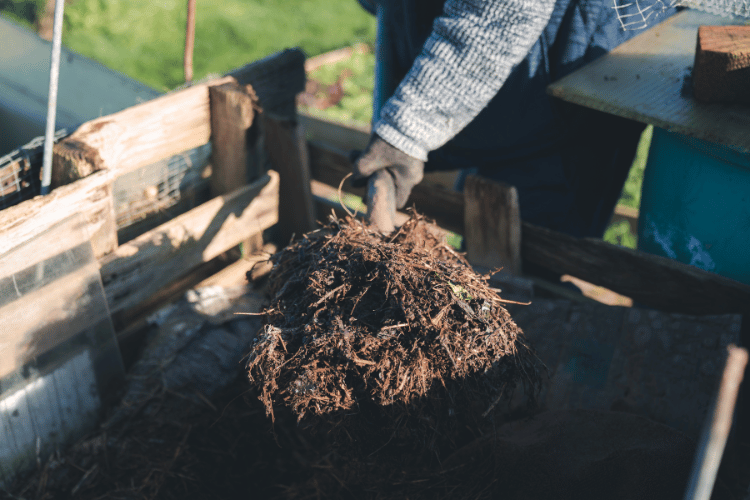
Extracting compost can disrupt a worm farm’s ecosystem in traditional batch vermicomposting. You have to empty the containers and separate the worms from the castings. It’s a whole process!
On the other hand, a commercial flow-through worm bin has a bottom floor of steel grates or mesh. During harvest, a cutting bar powered by electricity or hydraulics slices through 2–3 inches of the vermicompost.
Then, the finished compost falls through the grating to the ground or any catch mechanism. Meanwhile, the top layer settles down by the same amount, and microbial activity keeps breaking it down.
To keep the process running, you must refill the top layer with about three inches of fresh feedstock. The composting worms will keep digesting organic waste until it’s time for the next harvest.
Benefits of a Commercial Flow Through Worm Bin Design
Let’s explore why businesses should consider a commercial flow-through system:
- Production of High-Quality Vermicompost
Vermicompost is a gardener’s black gold—it’s way more valuable than regular compost.
A commercial flow-through worm bin takes vermicomposting to new heights. With a continuous flow system, the worms have a steady food supply, keeping them happily munching away.
And boy, can they eat! Just a pound of mature worms, around 800–1000 wigglers, can devour up to half a pound of organic matter within a day. Not only that, but they can transform organic materials into diverse and nutrient-dense compost.
In other words, CFT vermicomposting speeds up the composting process, leading to a higher yield.
- Mess-Free Separation of Worms from Worm Castings
Forget about the tedious task of combing through your finished castings to remove worms and coarser bits. A CFT reactor will do the dirty work for you!
As the cutting bar swoops in, worm-free vermicompost rains down through the grating while the worms go about their business in the active layer of the bin.
But it gets even better. Not only does this ingenious system save you precious time and effort, but it also keeps the worm population intact.
- Improved Waste Management Efficiency
Traditional methods fall short when handling large quantities of waste. A CFT machine eliminates the need to empty the bin and start over like you would with conventional batch methods.
These bins can handle substantial waste volumes, making sustainable waste management a breeze.
- Easy-to-Maintain Consistent Conditions
Compared to outdoor windrows, a CFT worm bin makes it easier to maintain optimal conditions for vermicomposting.
You can expect all sorts of trouble when you have a system in direct contact with the ground and exposed to the elements.
For example, the ever-changing climate and unpredictable rainfall can throw a wrench into the works. Also, unwanted pests and possible runoffs from the surrounding areas can become constant worries.
So, whether it’s scorching or pouring rain outside, a CFT system keeps chugging along and creating saleable vermicompost!
- Potential Revenue Stream From Sales of Vermicompost
Vermicompost, or vermicast, is an excellent soil conditioner for which customers are willing to pay more. It commands a higher price than regular compost because of its enhanced quality and benefits.
You can tap into this lucrative market by investing in a vermicomposting operation. There are various channels to sell vermicompost, including:
- Local garden centers, agricultural supply stores, and nurseries
- Online platforms
- Bulk sales to commercial agricultural operations
- Partnerships with local landscaping companies or organic farms
Drawbacks of a Commercial Flow Through Worm Bin Design
Commercial flow-through worm bins seem like a perfect system, but in reality, they have a fair share of disadvantages. Here are a few downsides to keep in mind:
- Initial Setup Costs
Installing a CFT system entails higher upfront costs compared to other vermicomposting methods. Large-scale operations require multiple bins, driving up your capital investment.
Not to mention, additional components like ventilation can add to the overall cost of the setup.
- Requires Regular Maintenance and Monitoring
Managing a successful CFT worm bin requires a learning curve. Operators must learn proper feeding, moisture control, and temperature regulation for optimal conditions. It may take time and experience to master these aspects and ensure the smooth functioning of the system.
Moreover, mechanical parts like drive trains and conveyor systems can be subject to wear and tear. They require regular maintenance and potential repair.
Not to mention, malfunctions and breakdowns can disrupt the operation and cause downtime and additional costs.
- Energy Requirements
Large-scale commercial CFT operations rely on an external power source to activate the cutting bars and operate ventilation.
You can expect increased power consumption and a spike in your operational expenses.
Design Considerations of a Commercial Flow Through Worm Bin
Here are some primary considerations to ensure the effectiveness and efficiency of a commercial flow-through installation:

- Size and Capacity
First, determine the appropriate size and capacity of the worm bin based on your specific needs and available space.
Next, consider the volume of organic waste you’ll be processing. A large bin allows for greater waste processing capacity and higher vermicompost production.
- Ventilation and Airflow
Incorporate adequate ventilation and airflow systems to ensure proper oxygen supply within the worm bin. This promotes aerobic conditions and microbial activities that assist in decomposition.
- Feeding Mechanism
Design a feeding mechanism for easy and controlled addition of feedstock to the worm bin.
- Pest Control and Prevention
Implement measures to deter pests from accessing the worm bin. For instance, you can use top barriers like a screen or mesh to prevent unwanted intrusion while allowing unimpeded airflow.
- Scalability and Flexibility
If you anticipate increasing your vermicomposting operation over time, make room for future expansion or modification.
- Temperature and Moisture Control
Check the daily temperature and ensure it’s within 55–90°F. For additional moisture, use a misting spray to achieve a uniform water application.
How to Operate a Commercial Flow Through Worm Bin Design
Check out this step-by-step guide on how to operate a commercial CFT system from setup to harvesting:
- Assemble the Worm Bin
Select a well-ventilated spot protected from extreme temperatures and away from direct sunlight.
Then, follow the manufacturer’s manual to set up your worm bin, ensuring it’s sturdy and secure.
- Prepare Bedding Materials
Once you’ve assembled your machine, lay down several layers of bedding on the bottom grating. You can use carbon- and nitrogen-rich materials like paper, cardboard, straw, or leaves.
These materials will prevent your base layer from escaping through the holes of the metal grates.
Over time, the bedding will disintegrate under the weight of a moist base layer. However, that layer will be so compact that it’ll stay above the grating.
- Add Potting Mix
Pour several inches of potting mix on top of the bedding, depending on the depth of your bin. You can use a mixture of peat moss, coco coir, or any worm-friendly materials.
This layer should have no food value because you want the worms to move toward the top, where fresher waste will be available.
- Spread Feedstock
Add a few inches of feedstock consisting of pre-composted food scraps, wood chips, or manure. Pre-composting is a crucial concept in mid-scale and more extensive vermicomposting operations.
This process employs hot composting at temperatures above 131°F, typically lasting around 4–6 weeks. Pre-composting offers the following benefits:
- Kills weeds and pathogens
- Reduces feedstock volume
- Stabilizes organic matter in the feedstock
- Reduces odor and pest attraction (e.g., fly larvae and vermin)
- Neutralizes feedstock pH
- Promotes a homogenous mix for equal consumption of the worms
- Introduce Worms
Now, it’s time to add our tiny workhorses!
Red wigglers (Eisenia fetida) are the most suitable worm breed for commercial vermicomposting because of their voracious appetite. Distribute them evenly on the top layer.
Remember, 25 pounds of worms equals one-half to one pound of composting worms per square foot. So, adjust the weight of your worms accordingly.
Feed the worms a layer of pre-composted feedstock per week over the next 12–14 weeks.
- Perform Test Harvests
Check your harvest to ensure that everything is working correctly. You’ll likely get coarse bedding materials, which you can put right back in.
- Harvest Finished Vermicompost
Vermicompost is ready for production harvest once it reaches a dark, crumbly consistency. You can run a fan for a few days if the harvested product needs drying.
Lastly, screen the vermicompost to weed out larger particles, undigested organic matter, and the occasional worm.
Wrapping Up
Businesses can contribute to a greener future through a commercial flow through worm bin design.
With the necessary knowledge and tools, you can manage organic waste on a grand scale while reducing your carbon footprint.
So, let’s build a better world, one worm bin at a time!